The Aquatech CR-60 housing is no longer being produced by Aquatech, it was originally designed for the Canon 60D body and used their L range of ports, they also produced a CR-7 housing for the 7D which used the same outer shell with a different back plate, tray and remote shutter release plug.
Since I replaced my 60D with a 70D recently I had to adapt my CR-60 housing to accommodate the new camera body.

camerasize.com is a handy site for comparing the sizes and layouts of various cameras, as you can see the 60D and 70D are very similar.
This post details specifically what I did to make the old housing functional, but you can apply these same ideas to any housing in order to adapt it for use with your camera.
Basic Rules For Adapting A Housing
- Don’t compromise the original seal – housing manufacturers have spent a long time getting the seals right, you don’t want to make any changes that affect these original seal surfaces, o-rings or waterproof controls.
- Make reversible changes wherever possible – if you can adapt the housing in a way that allows you to still use it for the original camera body you have more options for your own use and it will keep it’s value better on the second hand market.
- Contact the manufacturer if you’re not confident – most housing manufacturers can adapt a housing for you easily and for a reasonable price, especially if it’s a current housing that they still sell, so get in touch with them first in case there’s a simple way to get it adapted officially.
CR-60 Camera Tray

The tray before, with tape and after the filing, you don’t need to remove much.
The first obstacle I had was the metal tray that slides into the plastic slot inside the housing and keeps the camera in the right place, there’s a curved block on the front edge of the tray that fits the 60D’s shape perfectly, unfortunately the 70D body has a slightly more square shape in this area, so I needed to get rid of some material from this block.
I stuck two or three layers of duct tape onto the flat surface of the plate to protect it, then used a hand file to slowly file down the block until it matched the shape of the 70D, I didn’t need to remove too much material before it would fit on securely.
Pistol Grip, Shutter release and top dial controls
This was the easy part, once the tray fit the camera it is so similar in size and design that the top dial and shutter release buttons matched up perfectly with no modification necessary, you’ll find that nearly all Canon DSLR’s have this very similar lay-out of top dial and shutter so a housing for an old body like a 10D will often be easily adapted for a 70D in this area.
Likewise the 70D uses the same remote shutter release cable plug as the 60D, so the pistol grip connector just plugs in as before, or even a bit more easily thanks to the better positioning of the release socket on the camera with the 70D.
Live View or Pause/Rec Button
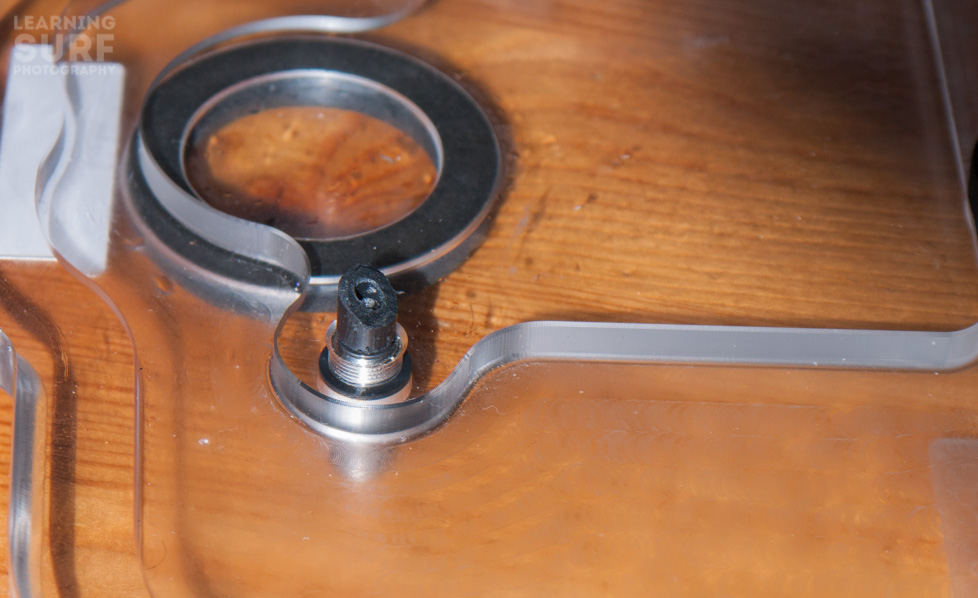
My back plate just has one button on it, for the pause/rec or live view button, this is one of the controls that has actually changed quite a bit from the 60D to the 70D, it used to be a simple button, now it’s a button with a rotating switch around it to select video or stills modes (like you find on the 7D).
The solution for a simple fix is to unscrew the black button tip from inside the back plate and replace it with a small piece of plastic tube which has been cut at an angle, the tube is screwed back on to the threaded end of the control so that it’s clear of the camera when not in use and can be used to depress the button when pushed in.
The obvious next step is to see if I can get control of the rotating switch as well as the push button, this would mean I actually have more control over the 70D than I had over the 60D which is a bonus.
I’ll save that for the next post in this series, for now, here’s a shot at ISO 1600 from the first shoot with the Tokina 10-17mm fisheye and 70D combo.

I pushed the shutter speed up in shutter priority mode to force a higher ISO than usual, just to see how it compared to the 60D, happily it’s quite a bit better. ISO 1600, 10mm, f3.5, 1/1250.
Leave a Reply