You might have noticed me mentioning a new toy of mine, a Blade 350QX quad-copter, I’ve been fascinated with the possibilities for aerial photography (and videography) for a while, I purchased a helicopter to try and get air born but never got further than the simulator on my computer, it’s incredibly hard to fly a helicopter if you don’t know what you’re doing, and a crash is pretty much devastating to the whole kit, so I sold it on and concentrated on Kite photography with my GoPro.
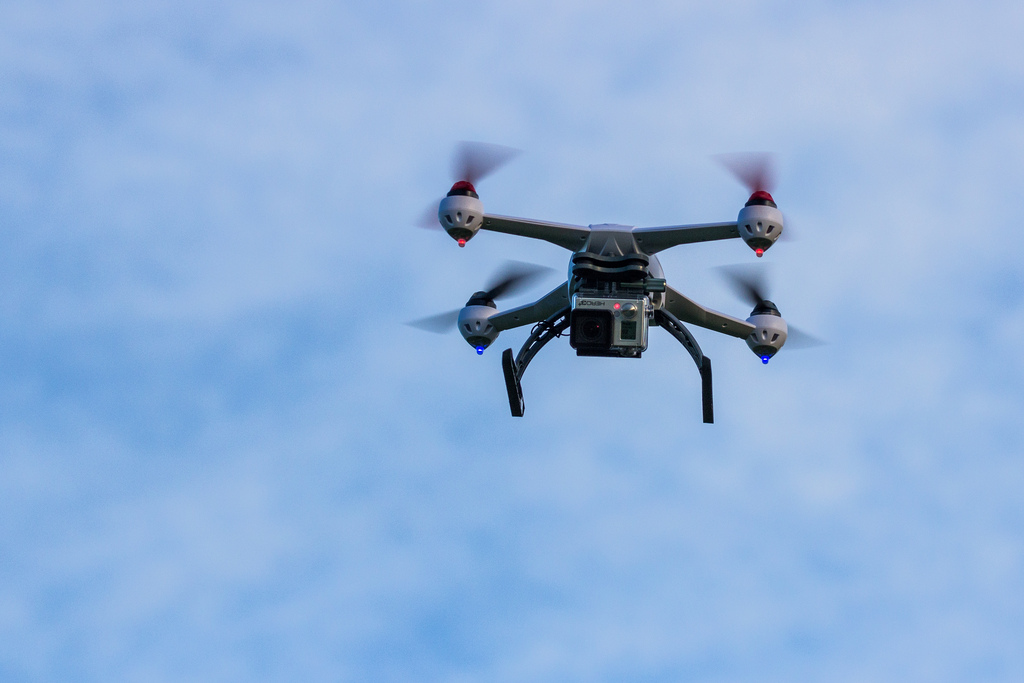
But recently, with the release of the DJI Phantom, and more recently still, the Blade 350QX, easy, stable flight with a camera attached has become a very real possibility even on a tight budget.
The Blade 350QX really piqued my interest when I saw the videos of the basic flight modes, it looked like the thing practically flies itself, and it’s designed to have a GoPro camera attached to it out of the box, the price is £350 for the ready to fly model which would allow me to start filming straight away.
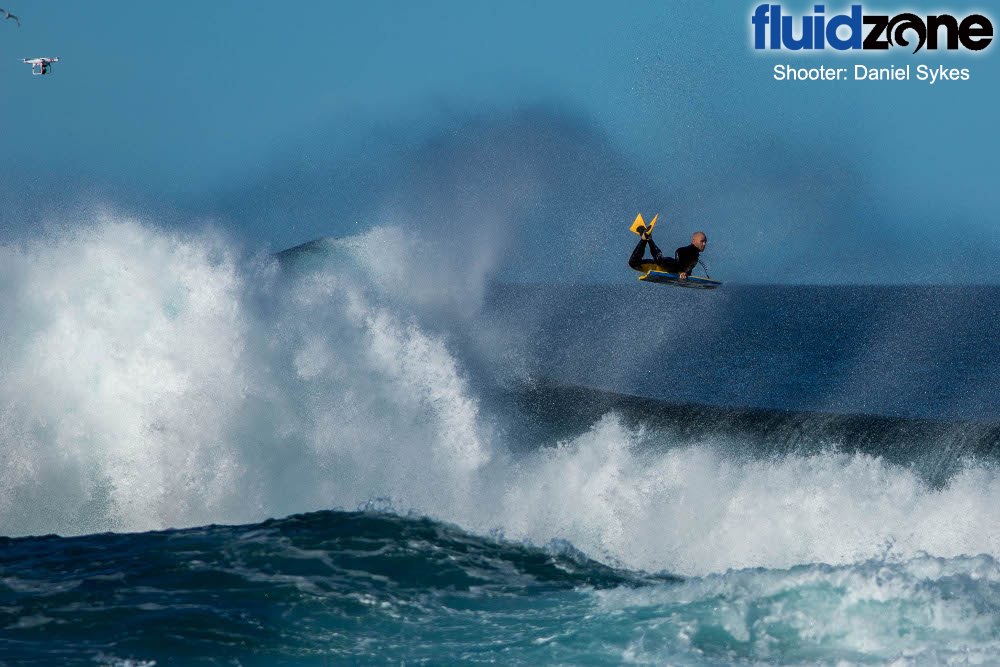
So I immediately began offloading any stuff I had lying around on eBay to try and get enough cash together to buy one, it didn’t take too long thanks to the relatively low price. Unfortunately it is the absolute worst time to buy a flying device in the UK, it’s dark before and after work, and it’s nearly always windy and raining, but it hasn’t stopped me getting this thing in the air and picking up the basics for using it to record surfing.
I already had the GoPro Hero 3+ Black Edition camera ready to go too, so check out my post on that if you’re starting from scratch.
This is part one, the rest to follow when I’ve got some more experience using this thing, for now you can see what I’ve bought for mine, where to get it, and some basic tips on getting it off the ground and safely back again with the camera attached and recording.
I am not a remote control hobbyist, so I’m learning a bunch of stuff as I go along, this post will be a good primer for anyone wanting to jump in who hasn’t experienced the RC Hobby world yet, see the bottom of the post for some more resources if this describes you.
What I’ve got:
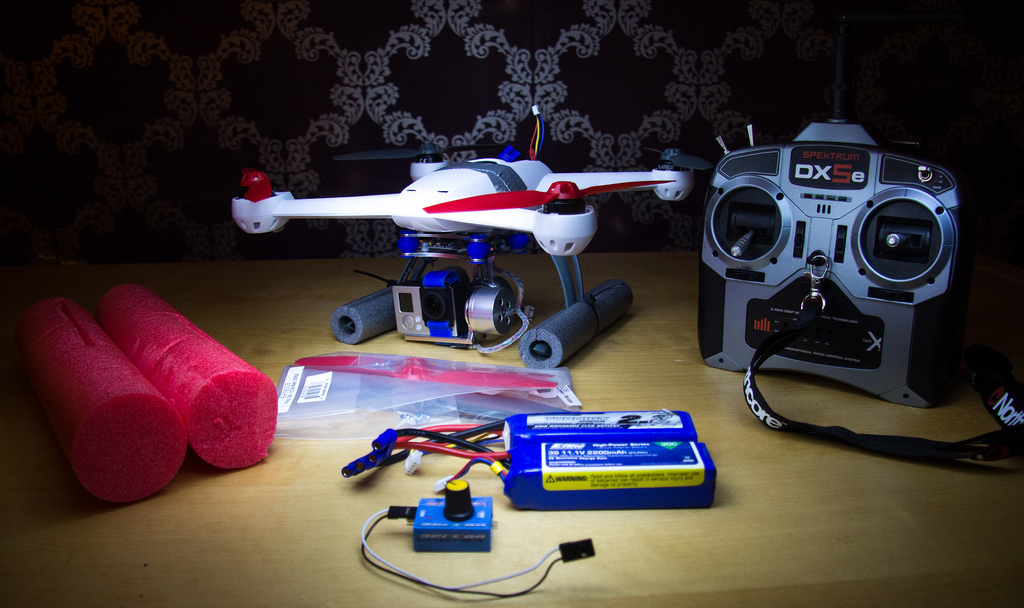
- Blade 350QX Ready To Fly Quadcopter – this includes the quadcopter itself, a charger, battery, spare blades, and the remote transmitter (A Spektrum DX5E)
- 2 x Extra batteries – you get about 10-15 minutes of flight time with the standard battery, these ones cost £25 for two and this seller on eBay solders on the right (EC3) connectors for you too, I got mine the day after I ordered.
- DIY 12 volt power supply from a PC PSU – you need one of these to charge the battery with the charger that’s included in the box, if you don’t want to use your car battery each time, I ripped mine out of an old computer, check out this Youtube video for the how to, or just buy a better charger if you can figure out what you need.
- eBay gimble – this stabilises the GoPro horizontally and vertically, basically keeping it level to the horizon however the quadcopter is tilting, pretty essential for smooth video, but not stills necessarily.
- Pool Noodle/Pipe Lagging – to go on the skids to raise it up off the ground when the gimbal is in place and to hopefully keep it afloat if it’s ditched in the sea.
- B Blades – these were free for me via Horizon Hobby’s website, I got one of the first quadcopters so I had the original blades which had an issue with breaking mid-flight, you might not need these if yours is from one of the later batches.
- Servo tester – this very cheap little device allows me to tilt the gimbal down a bit to avoid getting the blades in the shot whilst filming.
That’s what I’ve got, you don’t need it all, but this is a good set-up to start out with for shooting video and stills.
What you need to know:
The manual/quick start guide doesn’t tell you all of this, some is fairly obvious but if you’re not into the hobby already it can be frustrating trying to figure this out, I know it annoyed me until I got it sorted, mostly through trial and error.
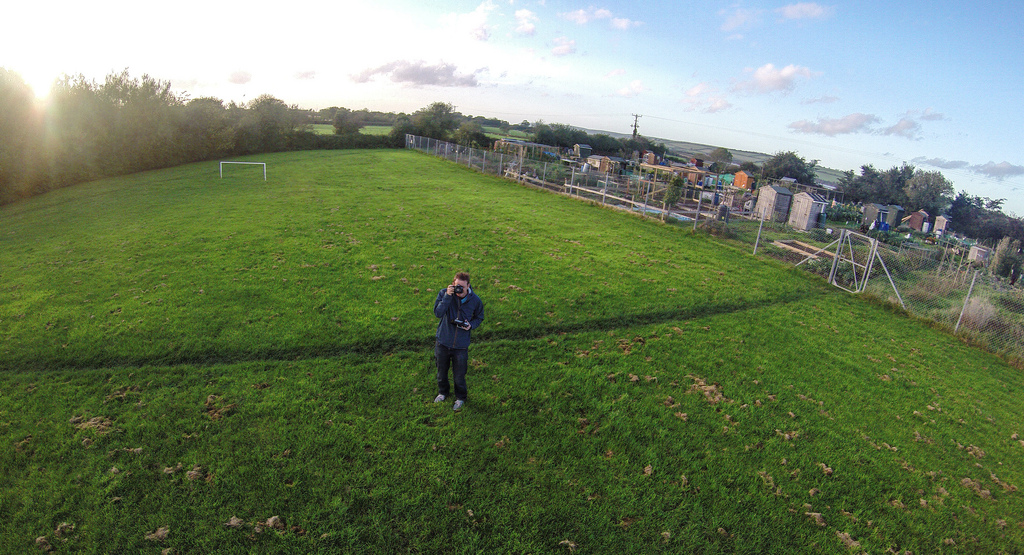
- The ground needs to be flat and have enough space for you to land in easily where you take off – you can actually take off from any bit of flat land, but landing is a different story, so be prepared.
- You can’t move around when flying in safe mode, you have to stand still so it knows where you are.
- The GoPro might interfere with the GPS lock – leave the camera switched off until you get the solid green light to indicate GPS lock, then switch the camera on and start recording before starting the blades up.
- You need to stand 15 feet directly behind the quadcopter when starting up the blades, so it knows where you are for smart mode.
- To start up you need to make sure your trims are centred (trims are the little clicky switches to the sides and below the sticks on the transmitter), you do this by clicking them either way and then back again until you hear a long beep
- The switch in the top right needs to be on “HI” to start it up, but if you then click it down to “LO” the controls are smoother for video.
- Make sure the three way switch on the left shoulder is all the way away from you, on the 0 setting, this is safe mode.
- To start the blades move the left hand stick all the way to the left, then all the way to the right quickly, it might take a few tries to get this but the blades will start spinning once you get it, keep the left stick at the bottom when you do this so it doesn’t take off really quickly.
- Lift off by moving the left stick up slowly, the altitude relates to where the left stick is in safe mode, so all the way at the bottom is the ground, all the way up is 45 metres in the air, you can go higher in stability mode (activated by flipping the three way switch to the middle setting, or 1).
- If you go from safe mode to stability mode when you’re not very high in the air the quadcopter will drop as soon as you hit the switch, this is because the left stick acts differently in stability mode, more in part 2 on this.
- To activate return to home mode you need to pull and hold the trainer switch on the left hand shoulder of the transmitter, once you’re holding this up towards you it will come home and land very close to where you took off from, make sure you keep it held or it will come out of that mode, also make sure you bring the left hand stick all the way down so it doesn’t just take off again as soon as it’s landed. It flies back to you in a straight line at a certain height, so don’t use it if you’ve got any trees or power lines between you and the quadcopter.
- To shut down the rotors you need to click down on the trim setting a few times, don’t forget to click it back up to the middle again otherwise you won’t be able to power up the rotors next time.
If that’s whetted your appetite check out these links for a bit more until Part 2 – using it to actually video or photograph some surfing.
External Links:
- Buy the Blade 350QX Ready To Fly
- Blade 350QX flight mode video on YouTube
- Cloak and Dagger magazine interview Phillip “Burg” Thurston – surf photographer who uses a similar drone
- Burg Thurston aerial image gallery
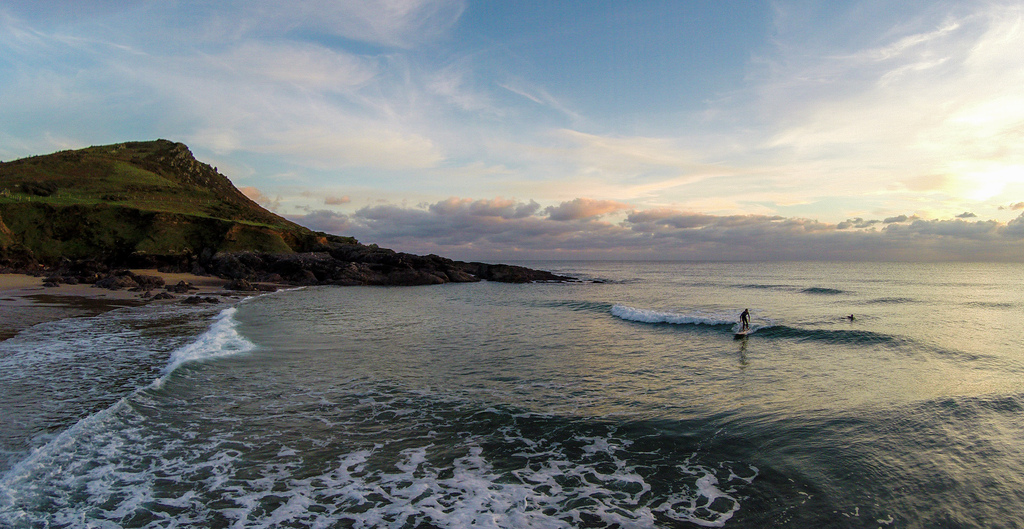
- Pixel Tim’s image gallery – shot with the Blade 350QX
- Heli Freaks forum on the Blade 350QX – lots of information
- Horizon Hobby’s UK website (makers of the Blade 350QX)
- National Geographic photographer crashes his much more expensive drone in China
Leave a Reply